Yard Machine Lawn Mower Manual: A Comprehensive Guide
Discover a detailed resource for Yard Machine mowers, covering assembly, operation, maintenance, and troubleshooting – ensuring optimal performance and longevity for your lawn care equipment.
Yard Machine has established itself as a prominent brand in outdoor power equipment, particularly renowned for its accessible and reliable lawn mowers. Catering to homeowners with varying yard sizes and landscaping needs, Yard Machine offers a diverse lineup, ranging from push mowers to self-propelled and even riding models. This manual serves as a comprehensive guide to understanding, operating, and maintaining your Yard Machine mower, ensuring years of efficient service.
Whether you’re a seasoned lawn care enthusiast or a first-time mower owner, this resource will provide valuable insights into the features and functionalities specific to Yard Machine products. We’ll explore everything from initial setup and safety precautions to detailed maintenance procedures, empowering you to keep your lawn looking its best. Understanding your mower’s capabilities and limitations is key to achieving optimal results and preventing potential issues.
Understanding Your Yard Machine Model
Identifying your specific Yard Machine model is the first step towards effective maintenance and repair. Locate the model and serial number typically found on a decal affixed to the mower deck or engine housing. This information is crucial when ordering replacement parts or seeking assistance from Yard Machine customer support. Different models possess unique features, engine specifications, and cutting deck sizes.
Familiarize yourself with the key components of your mower, including the engine, cutting deck, wheels, handles, and control levers. Understanding the function of each part will aid in troubleshooting and performing routine maintenance. Refer to the parts diagram (detailed later in this manual) for a visual representation of your mower’s assembly. Knowing your model’s capabilities – whether it’s a gas-powered, electric, or self-propelled unit – will optimize your mowing experience.

Safety Precautions
Prioritizing safety is paramount when operating your Yard Machine lawn mower. Always read and understand this manual before use. Keep children and pets well clear of the mowing area. Never allow untrained individuals to operate the machine. Before each use, inspect the lawn for stones, toys, or other objects that could become projectiles.
Wear appropriate safety gear, including sturdy footwear, eye protection, and hearing protection. Never operate the mower with missing or damaged safety shields. Disconnect the spark plug wire (for gas models) or remove the battery (for electric models) before performing any maintenance or repairs. Be mindful of exhaust fumes – operate the mower only in well-ventilated areas. Avoid operating on steep slopes or wet grass.
General Safety Rules
Always maintain a safe operating environment. Never operate the mower while under the influence of drugs or alcohol. Thoroughly inspect the mowing area for potential hazards before starting. Ensure adequate lighting if mowing in low-light conditions. Never attempt to override or disable any safety features. Keep hands and feet away from the cutting blade at all times, even when the engine is off.
Refuel the mower outdoors and allow it to cool completely before adding fuel. Avoid spilling fuel and wipe up any spills immediately. Store fuel in a properly labeled container and keep it out of reach of children. Be aware of your surroundings and watch out for bystanders. Stop the mower immediately if anything unusual occurs.
Specific Safety Features of Yard Machine Mowers
Yard Machine mowers incorporate several key safety features. A blade brake stop switch immediately halts the blade rotation when the handle is released. Operator Presence Control (OPC) systems require the operator to actively engage levers to keep the mower running, preventing accidental operation. Many models feature a discharge chute blocker to prevent objects from being ejected forcefully.
Furthermore, safety interlocks prevent the engine from starting unless certain conditions are met, such as a fully engaged blade control. Always ensure these features are functioning correctly before each use. Regularly inspect the safety devices for damage or wear. Never tamper with or disable these crucial safety mechanisms, as they are designed to protect you from serious injury.
Assembly and Preparation
Properly prepare your Yard Machine mower by carefully unpacking, attaching components, and verifying fluid levels – ensuring a safe and efficient mowing experience.
Unboxing and Initial Inspection
Carefully remove your new Yard Machine lawn mower from its packaging, taking note of all included components and hardware. Inspect the mower thoroughly for any signs of shipping damage, such as dents, scratches, or loose parts. Compare the physical contents against the parts list included in the manual to confirm everything is present.
Pay close attention to the engine components, blade, and safety features. Ensure the blade is securely attached, but do not yet install any protective covers. Check all cables and wires for proper connection and insulation. Retain the packaging materials until you’ve fully assembled and tested the mower, in case a return or exchange is necessary. Document any damage with photographs before proceeding with assembly; this will streamline any potential warranty claims. A meticulous initial inspection prevents issues later!
Attaching Handles and Components
Begin by securely attaching the handles to the mower deck, aligning the mounting points and tightening all bolts firmly with the provided tools. Ensure the handles are locked into position, providing a stable and comfortable grip. Next, install any included side discharge chutes or mulching plugs, following the diagram in your manual for correct placement.
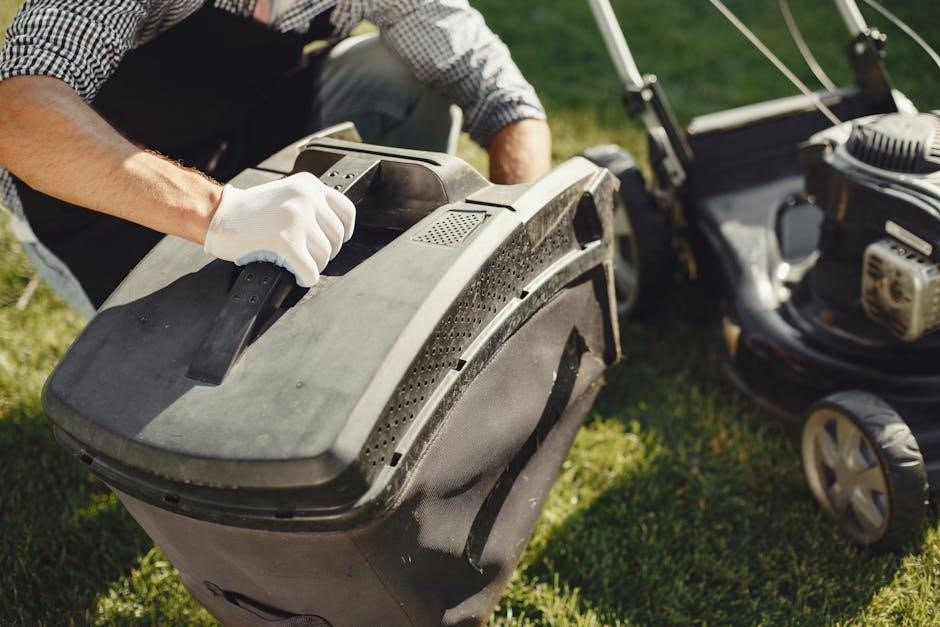
Double-check that all components are properly aligned and fastened before proceeding. Pay attention to cable routing, ensuring they aren’t pinched or obstructed. If your model includes a grass catcher, attach it now, verifying it clicks securely into place. A properly assembled mower is crucial for safe and efficient operation. Confirm all connections are tight to prevent rattling during use and potential component failure.
Checking Fluid Levels (Oil, Fuel)
Before each use, verify the oil level by removing the dipstick, wiping it clean, reinserting it fully, and then checking the reading. Add oil as needed, using the recommended type specified in your manual – typically a 30W oil is suitable. Never overfill.
Next, inspect the fuel level, ensuring it’s adequate for the mowing task. Use fresh gasoline with an octane rating of 87 or higher. Avoid using fuel that’s been sitting for extended periods, as it can degrade and cause starting problems. Always check for fuel leaks around the fuel tank and lines. Maintaining proper fluid levels is vital for engine performance and longevity, preventing damage and ensuring reliable operation.

Oil Type and Capacity
Yard Machine lawn mowers generally require a 30W weight oil for optimal performance, particularly in moderate temperatures. For colder climates, a 10W-30 oil may be preferable to ensure easier starting. Always consult your specific model’s manual for the manufacturer’s recommended oil type, as variations can exist.
The oil capacity varies depending on the engine size, but typically ranges between 15 to 20 fluid ounces; Carefully measure the oil when adding to avoid overfilling, which can cause engine damage. Regularly checking and maintaining the correct oil level is crucial for reducing friction, dissipating heat, and extending the life of your lawn mower engine.

Fuel Recommendations
Yard Machine lawn mowers are designed to operate on regular unleaded gasoline with a minimum octane rating of 87. It is crucial to use fresh gasoline, as fuel that has been sitting for extended periods can degrade and cause starting or performance issues. Ethanol content should ideally be no more than 10% (E10) to prevent damage to the fuel system.
Consider using a fuel stabilizer, especially if the mower will be stored for more than 30 days, to maintain fuel freshness. Avoid using gasoline blends containing methanol, as it can be corrosive. Always fill the fuel tank outdoors and away from open flames or sparks. Proper fuel management ensures reliable engine operation and prolongs the life of your mower.

Operating Instructions
Follow these guidelines for safe and effective mowing: start the engine correctly, adjust cutting heights, and employ proper techniques for a pristine lawn.
Starting the Engine
Before attempting to start your Yard Machine lawn mower, ensure the blade is disengaged and the parking brake is set. Verify sufficient oil and fuel levels, as detailed in the preparation section. Locate the primer bulb and depress it several times until fuel is visible.
Next, move the choke lever to the ‘choke’ position, especially for cold starts. Grasp the starter grip firmly and pull the cord with a smooth, controlled motion. Avoid jerking the cord, as this can damage the starter mechanism.
If the engine doesn’t start after a few attempts, allow the cord to retract fully before trying again. Once the engine sputters or attempts to run, gradually move the choke lever to the ‘run’ position. Continue pulling the starter cord until the engine runs smoothly.
Always maintain a firm grip on the handle during operation and never start the mower with your feet near the blade.
Adjusting Cutting Height
Your Yard Machine mower features multiple cutting height positions, allowing you to customize the grass length. These adjustments are typically controlled by levers located near each wheel. To raise the cutting height, move the levers backward, away from the mower deck. Conversely, to lower the cutting height, move the levers forward, towards the deck.
Ensure all four wheels are adjusted to the same height setting for an even cut. It’s recommended to start with a higher setting, especially for the first mow of the season or when cutting tall grass. Gradually lower the height with subsequent cuts until you achieve your desired lawn appearance.
Avoid setting the cutting height too low, as this can scalp the lawn and damage the grass; Regularly check the height settings to maintain consistent results and adapt to changing grass growth conditions.
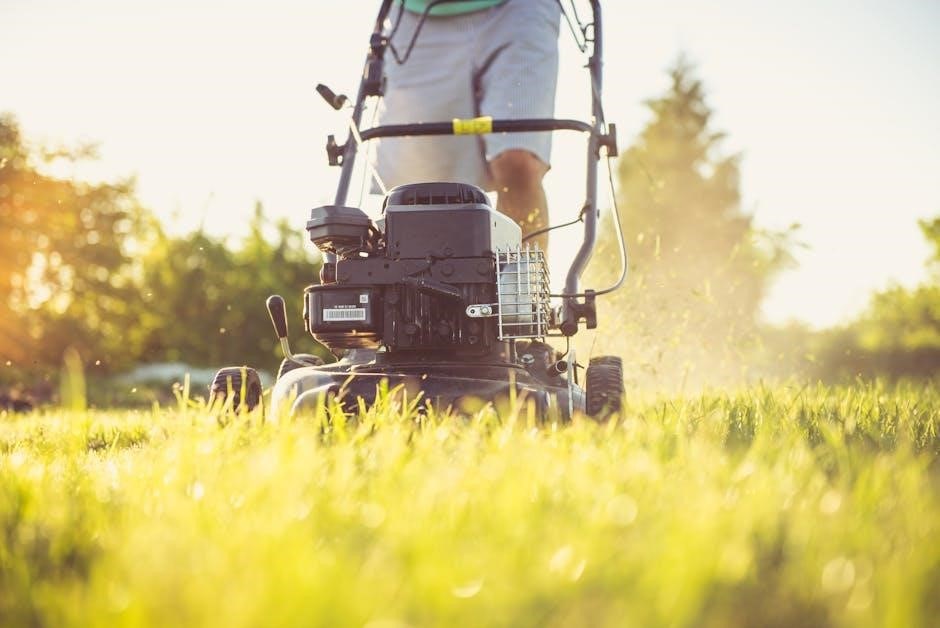
Mowing Techniques
For a professional-looking lawn, employ proper mowing techniques. Begin by mowing around the perimeter of your yard first, creating a clean edge. Then, mow in straight, overlapping lines. Overlap each pass by a few inches to prevent scalping and ensure a consistent cut. Vary your mowing pattern with each subsequent cut to avoid compacting the soil and creating ruts.
When mowing different grass types, adjust your speed accordingly. Thicker grasses may require a slower pace for a cleaner cut. Avoid mowing wet grass, as it can clog the mower deck and lead to an uneven finish. Consider mulching grass clippings to return nutrients to the soil, promoting a healthier lawn.
Proper Overlap for Even Cuts
Achieving a consistently even cut with your Yard Machine mower hinges on proper overlap during each mowing pass. Aim for approximately a 2-3 inch overlap with each subsequent stripe. This ensures that no blades of grass are missed, preventing unsightly streaks or scalped areas. Insufficient overlap results in an uneven appearance, while excessive overlap can strain the engine.
Visualize your path and maintain a steady pace. Overlap is particularly crucial when navigating turns or uneven terrain. Consistent overlap also aids in effective mulching, finely chopping grass clippings for nutrient return to the soil. Regularly inspect your blade sharpness to complement proper overlap for optimal results.
Mowing Different Grass Types
Your Yard Machine mower’s performance varies based on grass type. Cool-season grasses like fescue and Kentucky bluegrass thrive with a higher cutting height, typically 2.5-3.5 inches, promoting deeper root growth. Warm-season grasses, such as Bermuda and Zoysia, prefer shorter cuts, around 1-2 inches, for denser turf.
Adjust your mower’s cutting height accordingly. For thick or coarse grasses, a slower mowing speed and increased overlap are beneficial. Regularly sharpen your blade, as dull blades tear grass instead of cutting cleanly, impacting the health of all grass types. Consider bagging clippings for thick grasses to prevent thatch buildup.

Maintenance and Troubleshooting
Ensure peak performance and extend your mower’s life through routine upkeep, addressing common issues like starting problems, uneven cuts, and excessive vibrations promptly.
Regular Maintenance Schedule
Maintaining your Yard Machine lawn mower consistently is crucial for reliable operation and a prolonged lifespan. After each use, clean the mower deck, removing grass clippings and debris to prevent corrosion and ensure efficient cutting. Every 25 hours of operation, or at least once per season, inspect and tighten all bolts and fasteners.
Check the air filter monthly, cleaning or replacing it as needed to maintain optimal engine performance. Oil should be changed every 50 hours or annually, whichever comes first, using the recommended type and capacity. Inspect the spark plug annually, cleaning or replacing it to ensure reliable ignition. Sharpen or replace the blade at least once a year, or more frequently if you encounter rocks or other hard objects. Finally, store the mower in a clean, dry location during the off-season, disconnecting the spark plug wire for added safety.
Blade Sharpening and Replacement
A sharp blade is essential for a clean cut and a healthy lawn. Inspect the blade regularly for dullness, nicks, or damage. To sharpen, remove the blade and secure it safely. Use a metal file or a blade sharpening tool to restore the cutting edge, maintaining the original angle. Ensure balance after sharpening; an unbalanced blade causes excessive vibration.
If the blade is severely damaged, bent, or cracked, it must be replaced. Always disconnect the spark plug wire before handling the blade. Install the new blade correctly, ensuring it’s securely fastened with the proper torque. Never use a blade that is not designed for your Yard Machine model. Proper blade maintenance improves cutting performance and extends the life of your mower.
Air Filter Cleaning and Replacement
A clean air filter ensures optimal engine performance and prevents damage. Inspect the air filter regularly, especially after mowing in dusty conditions. For paper filters, gently tap to remove loose debris, or use low-pressure compressed air, blowing from the inside out. Foam filters can be washed with mild soap and water, then allowed to dry completely before re-oiling lightly with air filter oil.
Replace the air filter when it becomes excessively dirty or damaged, typically every 25-50 hours of use. A clogged filter restricts airflow, leading to reduced power and increased fuel consumption. Ensure the filter is properly seated in the air filter housing to maintain a tight seal. Regular air filter maintenance contributes to a longer engine life.
Spark Plug Inspection and Replacement
Regular spark plug inspection is crucial for reliable engine starting and efficient combustion. Disconnect the spark plug wire before inspecting or replacing the plug to prevent accidental starting. Check the spark plug for signs of wear, fouling, or damage – look for cracked insulators, eroded electrodes, or carbon buildup. A properly gapped spark plug ensures optimal ignition.
Replace the spark plug annually or as needed, based on its condition. Use the correct spark plug specified in your owner’s manual; Gap the new spark plug to the manufacturer’s recommended specification using a spark plug gapping tool. Tighten the spark plug to the specified torque to avoid damaging the cylinder head threads. A fresh spark plug restores engine power and fuel efficiency.
Troubleshooting Common Issues
Encountering problems? This section addresses frequent issues. If the engine won’t start, check the fuel level, spark plug, and air filter. Ensure the safety bail is engaged. For uneven cutting, sharpen or replace the blade, and adjust the cutting height. Verify the deck is level. Excessive vibration often indicates a loose blade or damaged engine component.
Inspect the blade for balance and tightness. Check for debris under the deck. If problems persist, consult a qualified technician. Never attempt repairs beyond your skill level. Refer to the parts diagram for component identification. Prioritize safety when diagnosing and resolving issues, always disconnecting the spark plug wire first.
Engine Won’t Start
A non-starting engine is a common frustration. First, verify fuel is present and the fuel shut-off valve is open. Check the spark plug for fouling or damage; clean or replace as needed. Ensure the air filter isn’t clogged, restricting airflow. Confirm the safety bail is fully engaged – it’s a crucial safety interlock. Inspect the starter rope for fraying or breakage.
If still no start, examine the carburetor for blockages. Low oil levels can also prevent starting; top up if necessary. A flooded engine may require allowing it to sit for a period before attempting restart. Consult a technician if these steps don’t resolve the issue.
Uneven Cutting
Experiencing uneven cuts? Several factors could be at play. Begin by checking the blade for dullness, damage, or improper installation. A sharpened blade is essential for a clean cut. Ensure the deck is level; an uneven deck will result in scalping or uncut patches. Adjust the cutting height to suit your lawn’s conditions – higher for uneven terrain.
Proper mowing technique is also vital; maintain a consistent walking speed and overlap each pass. Inspect the tires for proper inflation, as underinflated tires can affect deck level. Grass type can also influence cut quality; some grasses require more frequent mowing.
Excessive Vibration
Noticing excessive vibration? This often signals an underlying issue needing attention. First, inspect the blade for damage – bends or imbalances can cause significant vibration. Ensure the blade is securely fastened with the correct hardware. Check the engine mounting bolts; loose bolts contribute to vibration. Inspect the deck for any structural damage or loose components.
Worn or damaged bearings within the mower’s components can also be a source. Confirm all shields and covers are properly installed, as missing parts can exacerbate vibration. If vibration persists after these checks, professional servicing is recommended to prevent further damage.

Parts and Service

Locate genuine Yard Machine replacement parts easily through authorized dealers or online resources, alongside detailed diagrams for efficient repairs and maintenance assistance.
Locating Replacement Parts
Finding the correct replacement parts for your Yard Machine lawn mower is crucial for maintaining its performance and extending its lifespan. Several avenues are available to ensure you acquire genuine, compatible components. Firstly, authorized Yard Machine dealers represent a reliable source, offering expert advice and a wide inventory of parts. These dealers can often assist in identifying the precise part needed based on your mower’s model number.
Alternatively, numerous online retailers specialize in lawn mower parts, providing convenient access to a vast selection. When ordering online, always verify the part’s compatibility with your specific Yard Machine model. Utilizing your mower’s model number is paramount for accurate identification. Websites often feature parts diagrams and search tools to streamline the process. Remember to compare prices and shipping costs from different vendors to secure the best deal. Prioritizing genuine Yard Machine parts guarantees quality and proper fit, preventing potential issues and ensuring optimal mower functionality.
Understanding the Parts Diagram
Yard Machine parts diagrams are invaluable tools for identifying components and understanding your mower’s assembly. These diagrams, typically found in your owner’s manual or online, provide a visual representation of each part, labeled with a corresponding reference number. Familiarize yourself with the diagram’s key, which lists each number and its associated part name.
Exploded views illustrate how parts fit together, aiding in disassembly and reassembly. Diagrams are organized by sections – engine, deck, wheels, and so on – simplifying navigation. When ordering replacement parts, referencing the diagram ensures you select the correct item. Pay close attention to detail; slight variations can impact compatibility. Online diagrams often allow zooming for closer inspection. Mastering the parts diagram empowers you to perform repairs confidently and efficiently, saving time and money on professional servicing.
Contacting Yard Machine Customer Support
For assistance beyond the manual, Yard Machine offers several customer support avenues. Their official website is the primary resource, often featuring FAQs, troubleshooting guides, and downloadable manuals. A dedicated “Contact Us” section typically provides options for direct communication. You can often find a phone number for speaking with a representative during business hours, allowing for immediate assistance with complex issues.
Email support is another common method, providing a documented record of your inquiry. Online chat features, if available, offer real-time support. When contacting support, have your mower’s model number and serial number readily available; this speeds up the process. Be prepared to describe the issue clearly and concisely. Keep records of all communication, including dates, times, and representative names, for future reference.